Standard Import
When most sales reps receive their Leads in an Excel format they are typically given something similar to what we have below. Using one of the SalesNOW import Templates this data can be easily copied into an import template and brought into SalesNOW without any manual mapping.
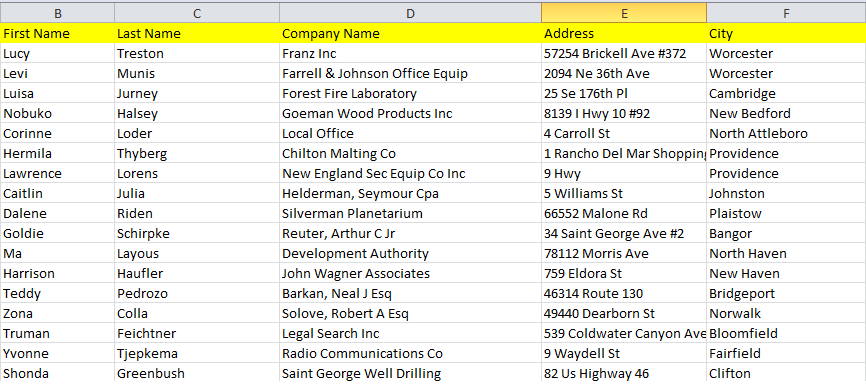
Step 1: Clean Up Data
Before downloading one of our templates have a look at your current spreadsheet and make sure that the data is clean. For example make sure that First and Last Name have been moved to separate columns.
?Note: The SalesNOW Template will only allow users to bring in Standard Data... Data found in Custom Fields cannot be imported using the Standard Import tool. Please see Custom Import FAQ section for how this data can be imported.
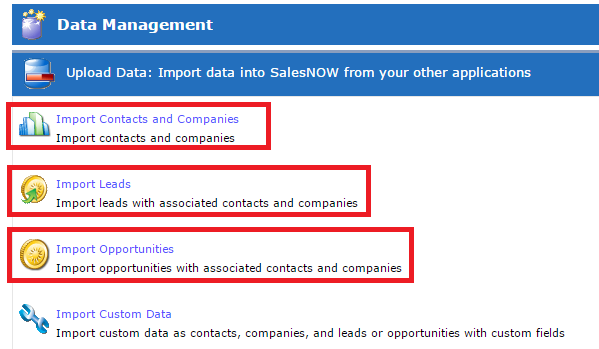
Step 2: Download the Template
Now that the data has been cleaned up in the original file, users can log into SalesNOW and visit Setup > Data Management and download the SalesNOW import template relevant to the Data. The options are Import Contacts and Companies, Import Leads and Import Deals. In the Contact Company Import users are able to bring in a Contact and or Company per row of data. In the Lead and Deal Import templates users can bring in a Contact and/or Company and Lead or Deal record, but must bring in at least the Lead or Deal portion of the record. To access the link for any of these Import Templates open any of these three options and click the highlighted link to download.
Step 3: Move the Data
At this point you should have an empty Import Template spreadsheet as well as your Sales spreadsheet that is full of your cleaned up data. As you may have guessed, the process now is to paste the data from the Sales spreadsheet into the Import Template. In this process there are a couple of things to avoid:
1. Do not modify the names of the template headers or remove any columns. Even if you do not have any data for a particular column simply leave it blank instead of removing.
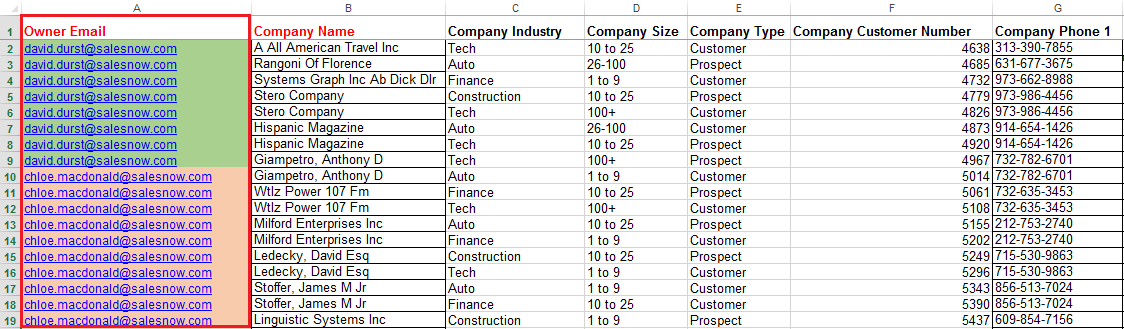
2. As you will notice in the Template there are a number of Column Headers with red text. For example in the Contacts and Companies import template, the Contact Last Name and Company Name are highlighted in this way. The colour of these Headers indicates that they are Mandatory fields. Basically, for a Company to be created it must have at least a Name. Even if the other Company data is included, the name is mandatory for that record to be added.
3. If you are bringing in multiple Contacts that you wish to be associated to a single company make sure that the Company data for each contact is exactly the same. ie. Name, Address and Company phone number.
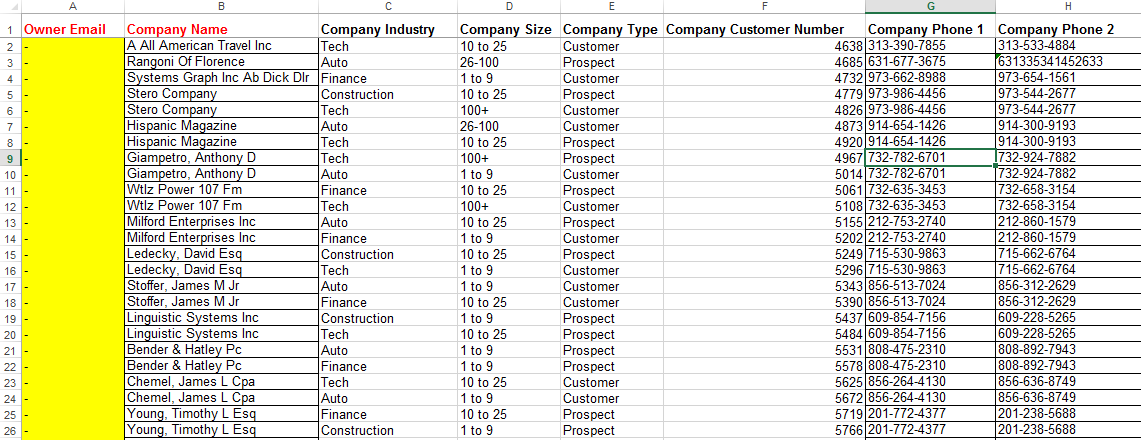
Step 4: Add an Owner
Once the data has been moved from the Sales spreadsheet to the correct location in the Import Template, users can then update the Owner field. The Owner field will be Column A of the import Template. The purpose of the Owner field is to map the location of each row of data to the correct user in SalesNOW. Please note that the username must be exact, also the there can be multiple Owners in a given spreadsheet.
Step 5: Save the File
Now that all of the data has been moved from the Sales spreadsheet to the Import Template, you are now ready to Save the file.
Step 6: Upload the Import Template
To finally upload the import template users can log back into their SalesNOW account and select setup > Data Management and select the Import template that they have already filled out. Next , users can simply select Choose File and locate the file that they wish to import.
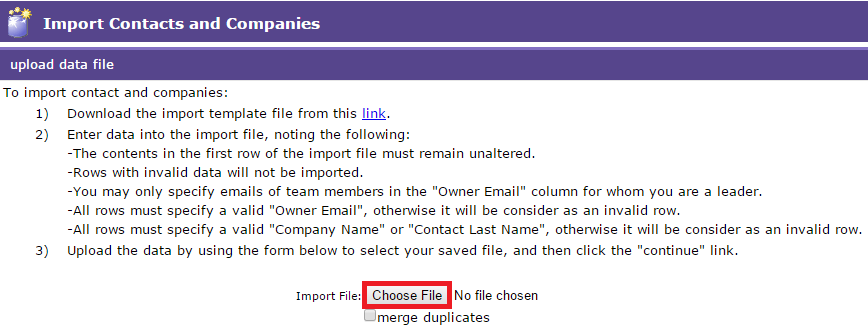
Users will also notice below the option Merge Duplicates beneath the Choose File button. By checking merge duplicates, the user is asking that the system search the spreadsheet for any duplicate data and if it does come across duplicates, that it merge the record into one when importing. Now that the file has been added users can then simply select Continue
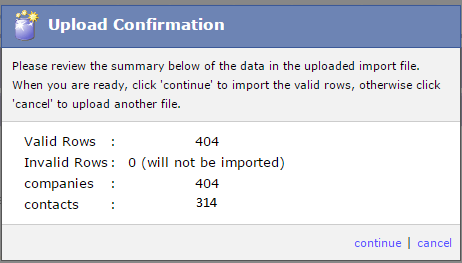
Step 7: Upload Confirmation
The system will now attempt to bring in the template data. After a loading period the system will then display an Upload Confirmation, summarizing the import. If there are any issues with the data the Upload Confirmation window will return a list error messages describing the issue(s) at hand. Users that receive these error messages should download the list and apply any necessary changes to the Spreadsheet Template, re-save the file and attempt to upload once again. If there are no error messages, simply select Continue on the Upload confirmation page.