FAQ: Outlook Add-In
How do I install the Outlook Integration for Outlook 2007?
To install the Outlook Add-In for Outlook 2007, simply login to SalesNOW on the Web and select
Setup > Install Outlook Integration
Next, click the Option to install the SalesNOW Outlook Add-In for Outlook 2007 and follow the prompts to install.
How do I install the Outlook Integration for Outlook 2010?
To install the SalesNOW Outlook Add-In for Outlook 2010, the first step is to find the Bit count of both Outlook and Windows.
To find your Outlook Bit count please open Outlook and select
File > Help
From this window you will be able to determine whether you are using a 32 Bit or 64 Bit version of the tool.
Next, to find the Windows Bit count please locate Computer either by visiting File Explorer (Windows 8) or Start (Windows 7), then right click Computer and select Properties. Next, take note of the Bit Count of the Windows system.
Now that you have both the Windows Bit count and the Outlook 2010 Bit Count please login to salesnow.com and select
Setup > Install Outlook Integration
From this area you will see three potential options to download beneath the Outlook 2010 Plugin,
64 Bit Outlook & 32 Bit Windows,
?32 Bit Outlook & 32 Bit Windows,
?64 Bit Outlook & 64 Bit Windows,
?32 Bit Outlook & 32 Bit Windows,
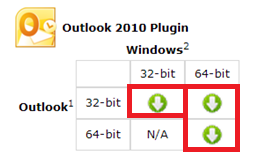
Select the version of the tool that meets your system requirements and follow the prompts to install.
How do I Install the Outlook Add-In for Outlook 2013?
To install the SalesNOW Outlook Add-In for Outlook 2013, the first step is to find the Bit count of both Outlook and Windows. To find your Outlook Bit Count please open Outlook and select
File > Outlook Accounts > About
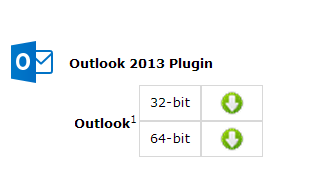
From this window you will be able to determine whether you are using a 32 Bit or 64 Bit version of the tool. Next, log into SalesNOW and select Setup > Install Outlook Integration
32 Bit Outlook
? 64 Bit Outlook
Select the version of the tool that meets your system requirements and follow the prompts to install.
Select the version of the tool that meets your system requirements and follow the prompts to install.
How do I compose a SalesNOW email in Outlook 2010 and 2007?
SalesNOW Users that have installed the Outlook 2010 or 2007 Add-In can compose emails that will be instantly saved to SalesNOW Contact records. To do so, users can select the Add-In tab in their Outlook followed by Compose Email.
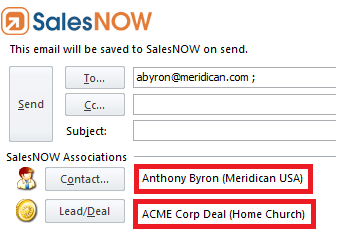
Next, they will have the option to select the SalesNOW contact that they wish to save the email to. Finally they can compose the actual email and click Send. The message will automatically be saved to SalesNOW once sent.
To locate the email in SalesNOW, users can either visit the Contact record or the Emails tab in SalesNOW.
How do I save a SalesNOW email in Outlook 2013?
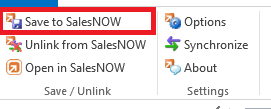
SalesNOW Outlook 2013 users are easily able to save outgoing and incoming emails in SalesNOW. To save an outbound email, users can simply visit their Sent Items folder, locate the sent email that they would like to have saved to SalesNOW, highlight the email and simply Click Save to SalesNOW button in the in the Add-Ins area.
Next, they will have the option to select the SalesNOW contact that they wish to save the email to
To save any incoming emails, users can follow the same steps but instead of visiting their Sent Mail folder they can visit their Outlook Inbox.
How do I save an email in my Inbox using the Outlook 2010 and 2007 Add-Ins?
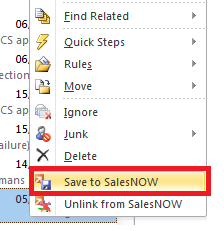
To save an email in your Outlook 2010/2007 inbox using the Outlook Add-In, simply highlight the email in your inbox, and then Right click. In the list of options, you should then see the option to Save to SalesNOW. Once you click the option to Save to SalesNOW you will then be required to identify the SalesNOW contact to associate the email to. Once all necessary associations have been added simply click Save.
How do I save an email in my Inbox using the Outlook 2013 Add-In?
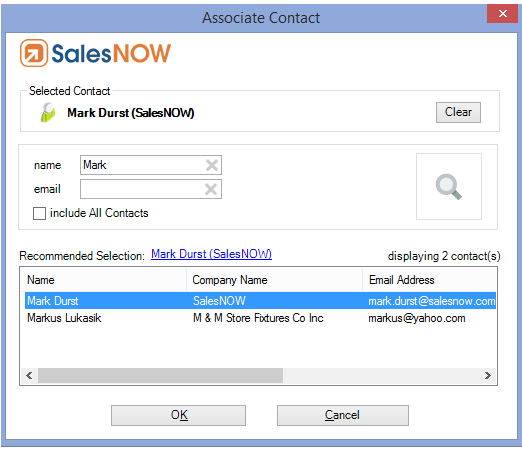
To save an email in your Outlook 2013 inbox using the Outlook Add-In, simply highlight the email in your inbox, and then open the SalesNOW Add-In from the Toolbar. Next, select Save to SalesNOW. Once you click the option to Save to SalesNOW the system will attempt to associate this email message to a contact in your SalesNOW. If the system does not return a matching contact name, users can simply select the Contact button and perform a Name search for the necessary Contact. Simply highlight the Contact name and click OK to complete this process.